Adjusting Sleeve Lift on My French Jacket

So in my last post I talked about finally finishing my French jacket (or my Faux-nel jacket as I call it). I really tried not to nitpick, but, well, I just can’t let some things go. I keep pinning and marking it up because every time I fix one thing, I see something else. It’s been a struggle to get it to fit the way I want. The main problem areas are the shoulders and sleeves.

First, the shoulder seam is too long. It was about an inch past where it should’ve ended. So that had to be adjusted. That was the easy part.

The sleeves have been giving me the blues since the beginning. I have NO idea why the Big 4 pattern companies make armscyes large enough to hold a toddler, but that’s also my problem with V8804, the Claire Shaeffer pattern I’m using. Not only is the entire underarm baggy, I couldn’t lift my arm at the shoulder without the entire jacket moving. I could only raise my forearms comfortably and it made me feel like a T-Rex.

Enter Threads Magazine. (If you don’t have a subscription, you need one. Seriously.) They always have a bunch of sewing articles that I read and say “Interesting, but when is that ever going to come in handy?” Well finally that day came. I recently read an article about sleeve lift (basically the amount of mobility your sleeve allows when you lift your arm), but I couldn’t remember which issue it was in. Luckily the Google machine works 24/7 so I tracked it down.

My friend-in-my-head Kenneth King wrote a pretty detailed article about how to adjust a pattern or muslin to make the sleeve fit better. It’s counterintuitive, but to make the sleeve fit better, it needs to have LESS room, not more.

For whatever reason I can’t embed his video, but here’s the link explaining the theory behind making the armscye smaller.

He offers three solutions: 1. Add ease throughout (lower the armhole and extend the biceps line of the sleeve); 2. Reduce the sleeve cap height; or 3. Raise the armhole.

I chose number 3 because it seems like the best solution for the silhouette of this jacket. And according to KK, it results in a “Chanel-like sleeve with a high underarm and a relatively slim sleeve with maximum lift” which is exactly what I wanted.

So that’s the alteration I’m doing now. There’s a side panel instead of a side seam so I taped the pieces together so I could just draw one curve.

IMG_2382

I added about 2-1/2 inches to the side panel (number 8) and tapered the line off to the other two pattern pieces. The red ink is to fix a line that wasn’t curvy enough.

IMG_2384

Here are the finished pieces with seam allowance added to the side front and side back.

IMG_2385

The other adjustment I’m working on is lengthening the sleeves because I’m just not a fan of bracelet length. Even when I was trying on the muslin, I just couldn’t get past how odd they look. So I added 5 inches so that the finished sleeve will end at my knuckles. And I’m going to flare them out a so they look like the ones from Tracey’s jacket below (the picture is from A Challenging Sew’s blog. Read the entire post here. Actually, go read the whole blog; she’s pretty amazing.)

I’ll be making yet another muslin tomorrow to fine tune the sleeves. Hopefully it’ll be my last and I can start cutting it out soon.

xoxo,

Blog signature


Return of the French Jacket

Like most seamstresses, I have a stash of fabric I’ve been amassing for years. Everything from knits to silk to $1/yard cotton prints. Yet I can never find something I like when I want to sew.

The situation became more acute since I decided to stop buying fabric until I use what I have. (Okay, I did buy some fabric a couple months ago but it was on impulse. I got some orange ponte for $3/yard. Don’t judge me. What was I supposed to do? It was ponte. At $3/yard. Don’t look at me like that; you’d have done the same thing.) So now I feel stuck between using fabric that doesn’t inspire me or breaking my “no buy” promise.

My solution is to dig deep and pretend I have no options; that I have to sew my way to freedom. I haven’t been sewing much because, as I mentioned in my last post, I’ve been deep in my coding obsession (I’ll be writing about that in a separate blog so you won’t have to read about it here.)

To get back on track, I’m revisiting old projects that I’d put aside because a) this is, after all, a blog about making stuff; and b) it’s spring and I don’t have any spring clothes.

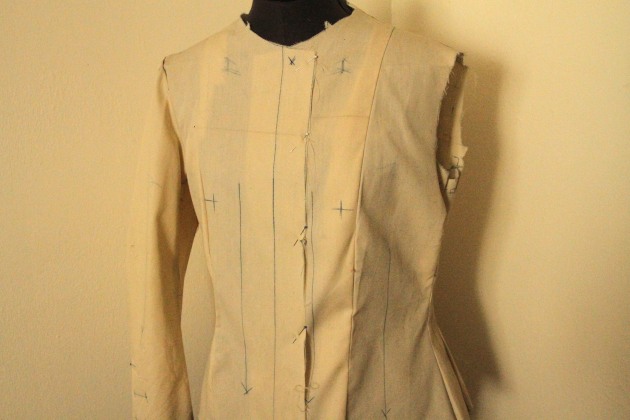
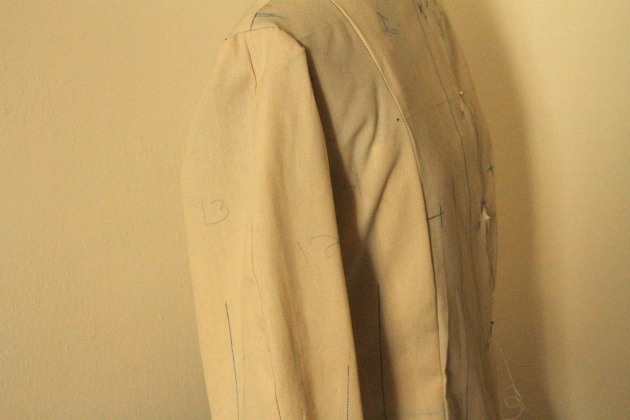
My first project is my super-overdue French jacket (Vogue 8804). The one I’ve been talking about since 2014. Yes, 2014!!!! I was waiting until I reached my goal weight, but you know what? I’m close enough AND I can buy more fabric for another one later. I found my old muslin and I’ve been tweaking it a bit, especially the sleeves, which are giving me agita.

IMG_2370

I know the sleeve isn’t set in properly, but I’m over it at this point.

IMG_2371

IMG_2373

See those markings at the bottom? I got that idea from A Challenging Sew. Apparently adding length to the center back visually elongates the torso. Go read the entire post because her finished jacket is so beautiful, it’ll make your eyes well up.

Most of the adjustments I had to make are ones I usually do anyway, but some of them were just baffling. For example, when I made up the muslin, I had a HUGE bubble in the middle of my back.  I know I always need to make a swayback adjustment, but this one was extreme. In the pic below, the black thread is the original seam and the red one is the new seam. At the widest distance, the two threads are about 1″ apart.

IMG_2363

I’m going to do a couple more fittings then I’ll be ready to take the muslin apart and start cutting the fabric.

And for anyone who still remembers the bra underwire saga, I finally got my underwires in the mail (yay!).

That’s my less ambitious (and hopefully more realistic) plan for this week.

So, are there any projects you’ve been working on (or planning to work on) for 2+ years? Share your pain the in comments; I’m here for you.

xoxo,

Blog signature

Grey Dress from V8787

So much for my moratorium on starting new projects

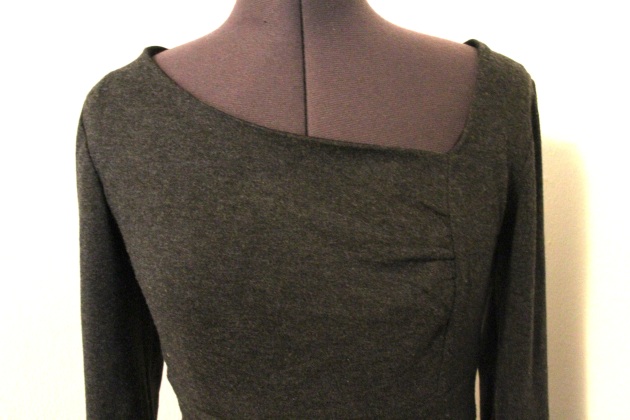
I wanted a new dress to wear this past Wednesday so I made Vogue 8787 in a maxi length. The neckline is lovely and since I made a version of it a couple of years ago, it came together pretty easily, and the fit was great, I thought “what could go wrong?” A LOT, as it turns out.

Let me tell you where things went left.

The last time I made it, I was about 30lbs heavier. Now most people would take that into consideration, but I didn’t. I cut the same size and it was a hot baggy mess. So my “easy ” dress turned into a nightmare of picking out stitches (no problem with wovens, but a PITA with knits) and resewing pretty much every seam except the sleeves. I ended up cutting a total of 8 inches off the hip area and 4 inches off the waist. All of these changes were because of my issue with phantom weight which I define as the size your mind still sees even though your body has clearly changed physically. I’ll go into this more in a later post because it’s really affecting how and what I sew.

Anyhow, it’s overcast here (again), but I did my best with the pics.


IMG_2095

My measuring was also completely off for the dress length AND the sleeve length. I had to add 4″ to the sleeves (you can see the seam in the picture below) and about 6″ to the bottom. There’s no explanation for this one; I swear I measured and re-measured the lengths. I’m chalking this up to being tired.

IMG_2094

My zipper was super ripple-y, but I steamed it to within an inch of its life so it flattened out.

IMG_2098

Finally, it’s fully lined with a thin black jersey from my stash.

IMG_2102


IMG_2101

I sewed the last seams on my dress about 3 hours before the event. Even though I took quite a few shortcuts, for the most part everything worked out and it fit very nicely. I was thinking about going back to fix a few things, but more likely I’ll just make a new one with my new measurements. For now, I’ll just be glad that I finished it – and had a good time while wearing it!

xoxo,

Blog signature


Setbacks – And Why You Should Always Check The Gauge

My Miette was almost finished when I tried it on and – gasp – it didn’t fit. It was much too tight and too short, so I frogged it and started over a few days ago.

I made two big mistakes with Miette.  1. I  didn’t knit a swatch to check the gauge; and 2. I tried it on when it was halfway done, knew it didn’t fit, but continued working on it. Basically, I went into denial

I confess that I rarely check the gauge when I’m knitting or crocheting. Yeah, I know I should, but once I get my yarn and needles ready, the last thing I want to do is stop and knit a swatch. This is only the second time I’ve had to frog something, so my track record isn’t bad, but I’ve learned my lesson. It’s just too heartbreaking when I’m almost at the finish line and then have to start over.

The second mistake is worse because I let my impatience override my common sense. I knew the cardigan was too small, but I told myself that I could stretch it a bit when I blocked it. And that I might be bloated so OF COURSE the cardigan will fit once the water weight came off. (This second excuse has no basis in reality whatsoever). But the truth is I didn’t want to start over after putting in all that work. I didn’t want to admit I was wrong. I just wanted to push through and get it done no matter what and somehow – magically – make it fit.

I’m working on my impatience. And I need to work extra hard at it when I’m making something. In the future, I’ll be more diligent about assessing projects while I’m working on them and – when I need to – start over. Even when it’s painful. Even when it costs me time. I could’ve saved myself hours of knitting if I did.

So no pictures today, but I will have something to share on Monday.

xoxo,

Blog signature