I swear I’ve been blogging in my head for the past month. Unfortunately my thoughts never made it to the actual blog. I really need to teach my cat how to take dictation.
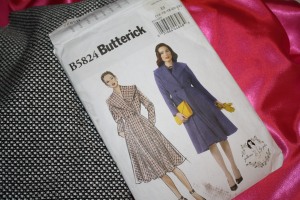
Anyhow, I have actually been working on a couple of things. Most recently a coat to bridge the time between now and when I need to pull out my pea coat. I figured I’d make something lined and cute. Enter Butterick 5824. I bought this pattern when it came out last year because it just looked so ladylike and I love fit and flare coats. I bought the material last year too, but by the time I planned to make the coat, it was already spring and since the material is grey, it just didn’t seem, you know, spring-y.
I love the weave of the fabric, but I have no idea what it is. I bought it from an unmarked bolt in a mystery fabric store. (I probably should write these things down, but oh well.) It drapes well and because the coat’s skirt is so wide, it’s somewhat heavy. The coat fabric is black & white and the lining is hot pink for no other reason than that I love hot pink.I can’t even imagine what a wool coat made from this pattern would weigh. I could probably get in my cardio and weight training just by wearing it.
As part of my ongoing effort to learn new techniques, I decided to zhuzh up my coat with bound buttonholes. Now, I love the way they look and I’ve made welt pockets, but never a bound buttonhole. I used the patch technique from Coletterie. It seemed complicated when I read the instructions, but it was pretty easy. You just have to be precise. Anyway, here’s the my first bound buttonhole scrap ever.

Now besides the obvious (the “lips” are uneven and I cut the fabric crossgrain – and the unclipped threads), I think it went pretty well. Now that I know what I’m doing, I’m sure the others will be gorgeous. My other challenge was finding buttons. The coat needs two 1″ buttons and I couldn’t find anything I like so I decided to do self-fabric buttons. I used a kit from Dritz, but I bought 1-1/8″ because my only other choice was 7/8″. I just have to make sure they fit through my bound buttonhole openings.
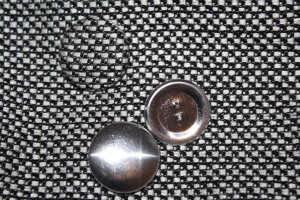
Did you see the button at the top? Very “Where’s Waldo?” right?
I’m also contemplating making a sash belt, but I’ll see how it looks when it’s finished. It’s coming together pretty quickly (though not as quickly as Edelweiss who made her coat in three hours. Yes, THREE HOURS?!? That’s crazypants. It took me longer than that to just cut out the pattern pieces.) Anyhow, I’ll be back soon with more pics.
Oh, and next time I have to tell you about my MAJOR book score. I still can’t believe I have a copy in my greedy little hands.


